


Installing a cedar roof requires meticulous attention to detail to ensure longevity and weather resistance. Both homeowners and contractors should refer to authoritative guidelines, such as the Cedar Shake and Shingle Bureau installation manual, for comprehensive instructions and local code compliance. Proper material selection, ventilation, underlayment, and fastening methods are essential to achieving a durable and high performing cedar roofing system.
What is a cedar roof?
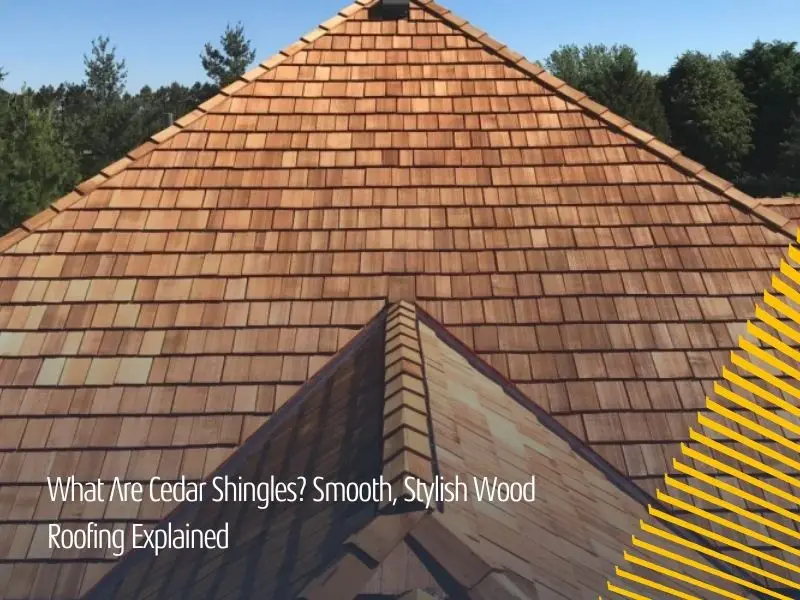
A cedar roof is a roofing system made from natural cedar wood shingles or shakes. It is valued for its durability, insulation properties, and classic appearance. Cedar roofs are commonly used on residential homes and are known for aging gracefully over time.
How should cedar shingles be installed?
Cedar shingles should be installed in straight, evenly spaced courses with proper side and head lap. Fasteners must be corrosion resistant and placed correctly to allow the wood to expand and contract naturally.
What do you put under cedar roof shingles?
Cedar roof shingles require a breathable underlayment system, often using felt or specialized interlayments between courses. Proper underlayment protects the roof deck while allowing moisture to escape.
What grade cedar shingles for roof?
Premium grade or Number 1 grade cedar shingles are recommended for roofing. These grades provide better durability, fewer defects, and longer service life.
Cedar roof installation is a specialized roofing process that combines craftsmanship, material knowledge, and strict adherence to installation standards. Unlike many modern roofing systems, cedar roofing relies on natural performance characteristics rather than synthetic layers alone. When installed correctly, a cedar roof can last decades while providing natural insulation and visual appeal.
Homeowners considering cedar roof installation often do so for its longevity and architectural character. Contractors, on the other hand, must understand detailed installation requirements to avoid premature failure. This guide walks through every stage of cedar roof installation, from material selection to long term maintenance, while highlighting best practices for both homeowners and professionals.
Expert Insight on Proper Cedar Roof Installation

According to the Cedar Shake and Shingle Bureau, proper installation is critical to roof performance. Their official guidance states that correct spacing, ventilation, and fastening methods are essential to prevent moisture retention and extend roof life.
Source: Cedar Shake and Shingle Bureau Installation Manual
Understanding Cedar Roofing Materials
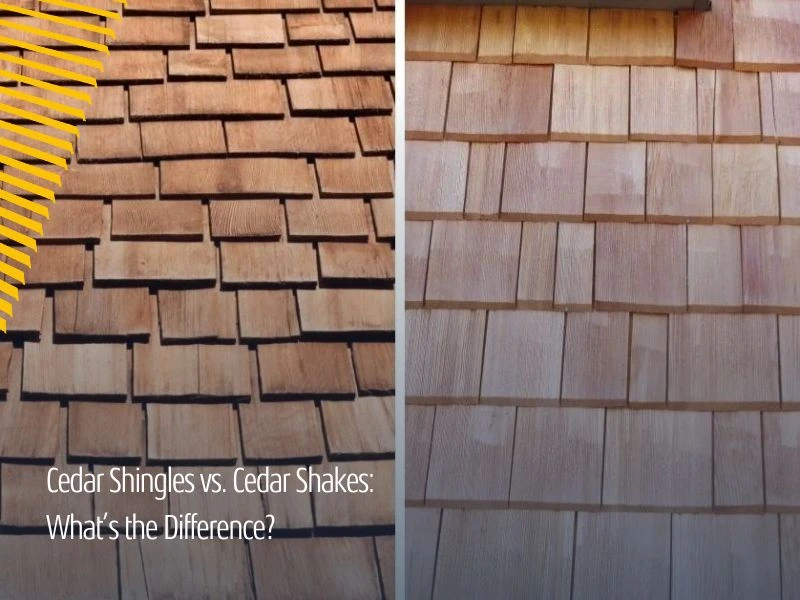
Cedar roofing materials are typically available as shingles or shakes. Shingles are sawn on both sides for a smooth, uniform appearance. Shakes are hand split, offering a more rustic texture. Both materials are commonly used in cedar roof installation depending on design preferences.
Western Red Cedar is the most widely used species due to its natural resistance to moisture, decay, and insects. The wood contains natural oils that help protect it from rot, making it ideal for roofing applications when installed correctly.
Grades of Cedar Shingles and Shakes
Cedar roofing products are graded based on appearance and structural integrity. Premium grades are recommended for cedar roof installation because they contain fewer knots and defects. Lower grades may be used in secondary structures but are not ideal for residential roofing.
Choosing the correct grade impacts the roof’s lifespan, appearance, and resistance to weather. Contractors should always verify grade markings before installation to ensure compliance with project specifications.
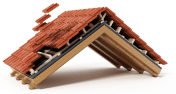
Roof Deck Preparation for Cedar Roof Installation
A successful cedar roof installation begins with proper roof deck preparation. The deck must be clean, dry, and structurally sound. Any damaged sheathing should be replaced before installation begins.
Spacing between roof deck boards is sometimes recommended to improve ventilation. In solid sheathing systems, proper ventilation strategies become even more important to prevent trapped moisture beneath the cedar roof.
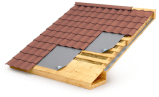
Underlayment Requirements for Cedar Roofs
Underlayment plays a unique role in cedar roof installation. Unlike asphalt systems, cedar roofs rely on breathable underlayments that allow moisture to escape. Many installations use felt interlayment strips between shingle courses rather than a fully covered synthetic layer.
This approach protects the roof deck from water intrusion while preserving airflow. Proper underlayment selection helps prevent cupping, splitting, and premature deterioration of cedar shingles.
Ventilation and Moisture Management

Ventilation is one of the most critical factors in cedar roof installation. Cedar must be able to dry naturally. Poor ventilation leads to trapped moisture, which can shorten roof lifespan significantly.
Ridge vents, soffit vents, and proper attic airflow work together to maintain balanced ventilation. Contractors should calculate ventilation requirements carefully to meet local building codes and manufacturer guidelines.
Fasteners and Installation Techniques
Fastener selection directly affects the performance of a cedar roof. Stainless steel or hot dipped galvanized nails are commonly required for cedar roof installation due to their corrosion resistance.
Nails should be placed correctly to allow natural movement of the wood. Overdriving fasteners or improper spacing can lead to splitting, warping, and reduced roof life. Precision during installation is essential.
Course Layout and Shingle Spacing
Each course of cedar shingles must be laid with consistent exposure and proper spacing between shingles. This spacing allows for expansion and contraction during temperature and humidity changes.
Uniform layout improves both performance and appearance. Contractors often use chalk lines to maintain straight courses throughout the cedar roof installation process.
Flashing and Roof Penetrations
Flashing details are critical in cedar roof installation. Valleys, chimneys, skylights, and roof transitions must be properly flashed to prevent leaks.
Metal flashing should be compatible with cedar and resistant to corrosion. Poor flashing installation is one of the most common causes of cedar roof failure, even when shingles are installed correctly.
Weather Considerations During Installation
Cedar roof installation should be performed in suitable weather conditions. Installing during excessive moisture or freezing temperatures can affect shingle performance.
Cedar should be acclimated to the local environment before installation. This helps reduce movement after installation and improves long term stability.
Common Installation Mistakes to Avoid
One common mistake in cedar roof installation is insufficient ventilation. Another is improper underlayment use that traps moisture instead of releasing it.
Improper fasteners, incorrect shingle spacing, and ignoring manufacturer guidelines also contribute to premature roof problems. Avoiding these mistakes ensures the roof performs as intended.
Maintenance Requirements for Cedar Roofs
Cedar roofs require periodic maintenance to achieve maximum lifespan. This includes inspections, debris removal, and monitoring for moss or algae growth.
Homeowners should schedule regular inspections to address small issues early. Proper maintenance complements correct cedar roof installation and protects the investment long term.
Cedar Roof Lifespan and Performance Expectations

When installed and maintained correctly, a cedar roof can last 30 to 50 years or more. Performance depends heavily on climate, ventilation, and installation quality.
Cedar roofs also provide natural insulation, helping regulate indoor temperatures. This added efficiency makes cedar an appealing option for many homeowners.
Planning and Cost Considerations
Cedar roof installation is a premium roofing option. Costs vary based on roof size, pitch, material grade, and labor requirements.
Planning ahead helps homeowners avoid surprises. Tools like SmartQuote allow homeowners and contractors to explore cedar roof pricing online before committing to a project. Using SmartQuote, homeowners can compare cedar roofing with other materials and understand how installation details affect overall cost.
Choosing the Right Contractor for Cedar Roof Installation
Not all contractors specialize in cedar roof installation. Experience with wood roofing systems is essential.
Homeowners should verify credentials, past projects, and familiarity with industry installation standards.
Cedar Roof Installation for New Construction vs Replacement
New construction allows more flexibility in roof design and ventilation planning. Replacement projects require careful removal of old materials and inspection of the existing roof deck.
Final Thoughts on Cedar Roof Installation
Cedar roof installation is both an art and a technical process. Success depends on proper materials, detailed workmanship, and adherence to proven installation guidelines. For homeowners, understanding the process helps ensure informed decisions. For contractors, precision and compliance are key to delivering a roof that performs for decades.
Key Takeaways
- Cedar roof installation requires strict adherence to installation standards
- Proper ventilation and underlayment are essential for moisture control
- Premium grade cedar shingles provide the best performance and longevity
- Correct fasteners and spacing prevent premature damage
- Regular maintenance extends cedar roof lifespan
- Planning and transparent pricing simplify project decisions
Get Started with Your Roof Today
Ready to see exactly what your cedar roof installation will cost and buy it entirely online without the sales pitch? Get your free SmartQuote today!
Related Reading: